Sponsored


Friday, April 17, 2009

Vintage doll wig replacement, part 1

A couple weekends ago I did my first wig replacement on a vintage doll.

I had two Ginger/clone dolls: one doll with a broken neck but a good wig, and another with a great body, great face paint, but Medusa hair.


Photo by dallcm

Getting the bad wig off of the good doll was pretty easy, because the only thing I had to worry about was holding her head still so that I wouldn't break her walking post. Once the wig was off, I used my favorite doll cleaner to remove all of the glue residue. It took a little elbow grease, but the cleaner removed the glue!

Taking off the other doll's wig was a little trickier, as I had to be careful not to damage it. Luckily it is a genuine Cosmopolitan Ginger wig, with a full fabric cap (as opposed to the clone wigs, which generally just had a strip of fabric under the stitched part). I was therefore able to just focus on working the cheesecloth fabric away from the head. I didn't use water or doll cleaner to loosen it, just carefully worked the tip of a spoon under the fabric and avoided tearing it as much as possible.

Once I got the wig off, I put it on the other doll's now-shiny bald head, and moved it around a bunch to see how it looked in various positions. Once I had decided how I was going to position the wig, I had my husband hold the doll while I did a "practice run" without glue. I wanted to be certain I got it right the first time!

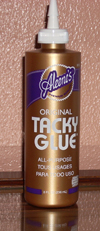
Finally I was ready to glue the wig on. I applied Tacky Glue directly to the inside of the wig — a circle all around the outer edge, a line of glue down the stitching for the part, and a little squiggle on each side of the part. I wanted to be sure I used plenty of glue, but I also had to be sure I didn't overglue.

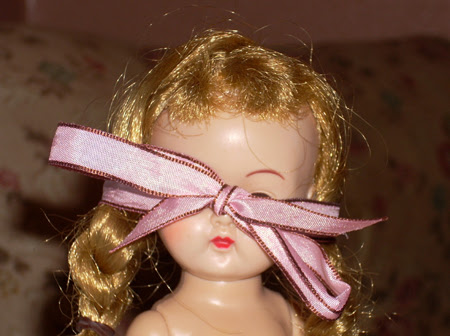
When I put the wig on, I positioned it and then held it tight with my fingers for several minutes. When I was confident that it was starting to set, I tied a ribbon around the doll's head to keep the wig in place.

Stay tuned for the unveiling — my next post will address restyling her hair and putting the finishing touches on the replacement wig!


Monday, April 13, 2009

Doll cleaning and a mystery doll

It always amazes me how much you can transform some dolls with just a little cleaning. This doll — a little mystery doll that I haven't yet identified — was so dirty that it actually affected whether I liked her, and as a result I was planning on selling her. But then I decided to clean her up first, and guess what? It turns out I like her after all!

In this picture, you can see how dirty her face was before — and how clean and pretty a little doll cleaner made it. The darker half of her face is not in shadow or Photoshopped — it's dirty! Amazing, isn't it?


Now to explain the mystery. This little strung 8-inch toddler doll is clearly made using the same mold as the medium- and large-eyed Gingers and clones. She is also dressed exactly like Carol Sue, a strung clone that used the Ginger body. However, she is made of a much lighter plastic, her eyes are different, and she is stamped on her back with:

A 175
A.T.C.
MADE IN HONG KONG


So who is she? I have no idea. Maybe someday I'll be able to find out. But at least she is clean now!

Friday, April 10, 2009

Waste not, want not

Even doll collectors can benefit from the wisdom of "Waste not, want not."

The other day I was trying to decide what to do with my extra Frontier Girl Ginger from my Disney dolls display. I have two of these dolls, but the other one is mint in box so I haven't displayed her before. However, she has blond braids just like my new Davy Crockett doll, so I decided to put her into the display.

I was planning to sell my extra Frontier Girl. I even took pictures and wrote out the description for the listing, but I started having major second thoughts. Even though this Ginger doll's hair is down, her face coloring is gorgeous. Really, her hair being down is her only flaw.


After some agonizing indecision over whether I ought to be selling her, it occurred to me that I have several Ginger outfits just waiting for a doll to wear them. Rather than selling this doll and then spending more on a new doll with mint hair, why not just redress her in one of them? Even if I decide to put a different doll in the dress later, at least I will get some more enjoyment out of her — and get a great outfit on a doll.


I will keep her original Frontier Girl outfit, of course, in case I decide to redress her in it — or even sell her — at a later date. In the meantime, she looks darling in the outfit, and I am very happy with my decision!

Wednesday, April 8, 2009

Rags to riches, part 2

One of my favorite parts of complete a project doll is finding the correct clothes and accessories to complete the doll, as I did with the Davy Crockett doll that is now in my display of 1950s Disney dolls.

My last post about this doll demonstrated how much a doll can be transformed by cleaning and restyling its hair. But that transformation is not complete until the doll has appropriate clothing, too.

I actually did not intend the Davy Crockett outfit for this doll when I first saw it — I just knew that I wanted the outfit. A couple of days later, I restyled this doll's hair, and knew then that she would be perfect for the outfit.

The outfit was boxed — in the wrong box, but as I discovered when I got the outfit, it had probably never been on a doll. It was therefore very stiff, as the suede material they used didn't really age very well. I steamed the outfit to make it flexible enough to get on my doll, but even so, it took a lot of coaxing. Now that it's on, I am never going to take it off!

The outfit is great — it includes the suede fringed skirt and top, red suede boots, a red belt, "saddle bags" to hang on the belt, and of course a darling rabbit fur "coonskin" hat with a little "tail." The outfit also has the rifle, which I was thrilled about, of course!

Even with her pale face and rebraided hair, this outfit transforms this little Ginger from a six-dollar doll into one of the sought-after Disney Gingers. I'm very proud to have uncovered this little diamond in the rough!

Monday, April 6, 2009

Rags to riches, part 1

My "Ginger as Davy Crockett" or "Pioneer Girl" (depending on which Cosmopolitan catalog you are looking at) is a true rags to riches story as far as dolls go, as I noted in my post about my 1950s Disney dolls display.

When I got her, I had no idea she would become one of my favorite dolls overnight. A friend of mine, who also collects Ginger dolls, sent me the auction on eBay (thanks, Regitze!). She didn't look like much, and wasn't identified as Ginger, but I decided to take a chance and bid on her anyway. I ended up winning her for $6.50.


Photo by hytenjr

When I got her, I was delighted to find that her hair is parted for pigtails. That made me happy because I can easily restyle pigtails. Ginger's hard rolled flip, though, is difficult to duplicate. I've done it once and will probably never try it again, it was so frustrating!

Restyling her hair was one of the doll projects I worked on a little more than a week ago. I was able to fairly easily repart the hair. I also found that the hair was still a little crimped from the original braids, which made it easier to rebraid it.


I also cleaned her up a little bit, as she had some play soil on her, especially on her face.

In my next post I'll talk about finding her an appropriate outfit to complete her transformation!

Friday, April 3, 2009

My vintage Disney doll display

I have eight dolls in my collection right now that represent Disney characters or were sold using the Disney name. I have put together six of them on one of my shelves in my doll cabinets as a vintage Disney doll display.


Alice in Wonderland by Madame Alexander, 1951
Cinderella by Madame Alexander, 1950
Prince Charming by Madame Alexander, 1950
Snow White by Madame Alexander, 1952
Ginger as Davy Crockett by Cosmopolitan, c. 1954; also called Pioneer Girl in 1956 catalog
Frontier Girl Ginger by Cosmopolitan, c. 1956

Disney put their name on a whole bunch of Cosmopolitan Ginger dolls in the mid-1950s. The Davy Crockett doll is actually a new addition to my collection, and a true rags to riches story. I'll be blogging about her in a series of posts to come!


Thursday, April 2, 2009

Washing vintage doll clothes

Washing vintage doll clothes is a tricky business. Washing a doll's clothes typically detracts from a doll's originality and lowers the doll's value, particularly if you can really tell the clothing has been washed. However, dirty clothing also reduces the value.

Deciding whether to wash a doll's clothes therefore entails weighing the pros and cons — whether the doll's value will be affected more by dirty clothes or washed clothes. It can also be affected heavily by personal preference — i.e., whether you prefer a doll in your collection to be as original as possible, or as clean as possible.

In any case, whether to wash your doll's clothing is a very personal decision, so I won't give you advice on when you should or shouldn't. If you do decide to, however, this is how I prefer to wash my doll's clothing.

You will need:

* Biz laundry soap
* A large bowl or a mixing bowl
* An upside-down bowl, or a clean bottle, on which to dry the dress.

Note: Always remember to use cold water when washing vintage doll clothes. Some of the dyes were not very colorfast, and warm or hot water can cause them to run.

1) Put a small scoop of Biz into the bowl and fill with cold water, stirring to mix the detergent in as well as possible. Put the clothes in, stir again, and allow to soak. Do not scrub spots.

2) Check on the clothes and stir the water periodically. You may want to turn the clothes so all of it gets immersed in the water at some point. Change the water and Biz if the water becomes dirty or clouded.

3) Soak for up to 24 hours, checking the clothes frequently for damage caused by soaking too long, such as bleeding dye or tears in the fabric. Remove the clothes immediately if you see any of this. In my experience, cotton and taffeta hold up over 24 hours pretty well, but the more fragile organdy and satin should be taken out sooner.

4) Remove the clothing from the water and rinse under running cold water. Scuff the fabric lightly with your fingers as you rinse it to make sure none of the detergent is left in the fabric.

5) When the clothes are rinsed, you can press the clothes gently to squeeze out the extra water, but do not wring. This is very important, as wringing causes wrinkles that often do not come out again!

6) Arrange the clothing how you want it to dry. For instance, if the skirt is full and you want it to stand out a bit on the doll, arrange it flat, in a circle, with the bodice of the dress standing up. If you don't want it to stand out as much, arrange the dress over a bowl, so that the skirt hangs down around it. Be sure to puff out sleeves, etc., so that they don't dry flat or creased.

7) Allow the clothes to dry overnight. Do not use heat to dry them faster.

In my experience, this method of washing will not remove the sizing (the factory stiffness in the fabric, desireable in mint or near-mint dolls). Sometimes I've even found that vintage doll clothing that has been machine washed or ironed (which makes them limp) regains some of that desireable stiffness with this method.

Good luck!

Sponsored


Popular Posts